I recently needed to change the subnet mask from /24 to /23 for a customers network, which also included changing the DHCP scope. Unfortunately its not possible to change the subnet mask through the GUI.
Rather than delete the current scope and recreate this manually, a quick Google helped me find a quicker solution.
-
Open Command Prompt and run the following command:
1netsh dhcp server \\<DHCP SERVER> scope 192.168.X.X dump > C:\dhcpconfig.txt -
Open the configuration file that we exported the configuration to in step 1 (dhcpconfig.txt). Look for the highlighted subnet mask like in the image below, change the highlighted subnet mask to the new subnet mask.

If you are also going to change the DHCP range that the server is going to give out to clients make the change here:

-
When saving the file make sure its being saved using ANSI encoding.

-
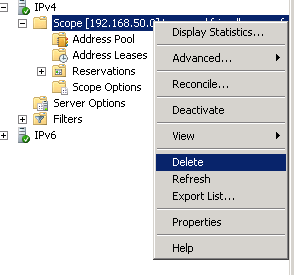
Now delete the current DHCP scope.
-
Next we are going to import the DHCP configuration text file using the following command:
1netsh exec c:\dhcpconfig.txtIf you have any excluded IP ranges that are in the old DHCP range then these will fail to import and the errors can be ignored.
-
Confirm that all looks as expected in the DHCP GUI and run the following command on a client machine to make sure that the client gets a IP address in the new range.
1ipconfig /release && ipconfig /renew