Having been tasked with finding a solution to migrate devices from one Office 365 tenant to a new tenant, I came across the following post:
Additional planning that may be needed:
- Migration for Mailboxes and Onedrive migrations from source to destination.
- Configure Onedrive Known Folders syncronisation to catch any user data.
Optional configuration:
- Configure company branding within the new tenant.
Creating a Autopilot deployment profile / Enabling MDM enrollment
-
After creating a new tenant (destination tenant), creating the users accounts and assigning the licenses you will need check that users have permissions to enroll devices in Intune. To do so you will need to go to https://endpoint.microsoft.com > Devices > Enroll Devices > Automatic Enrollment.
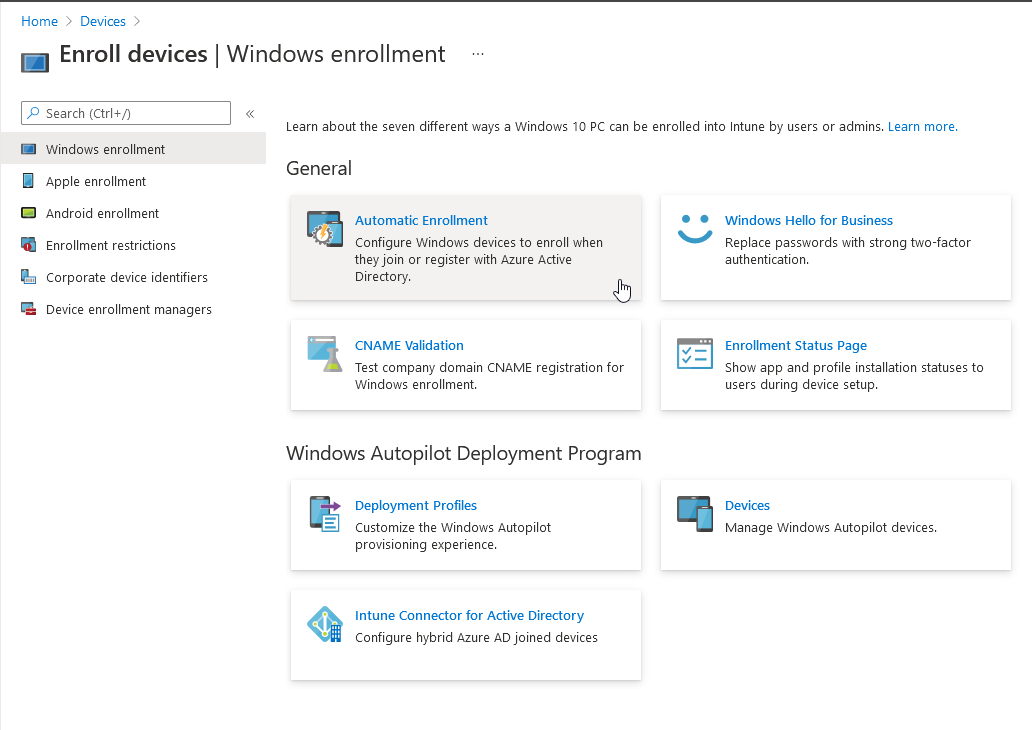
You will need to set “MDM user scope” to “Some” (Choose who can) or All to cover all users. For good measure set the “MAM user scope” to the same.
This will allow the users device to be registered correctly with Intune when first signing in to the machine.
-
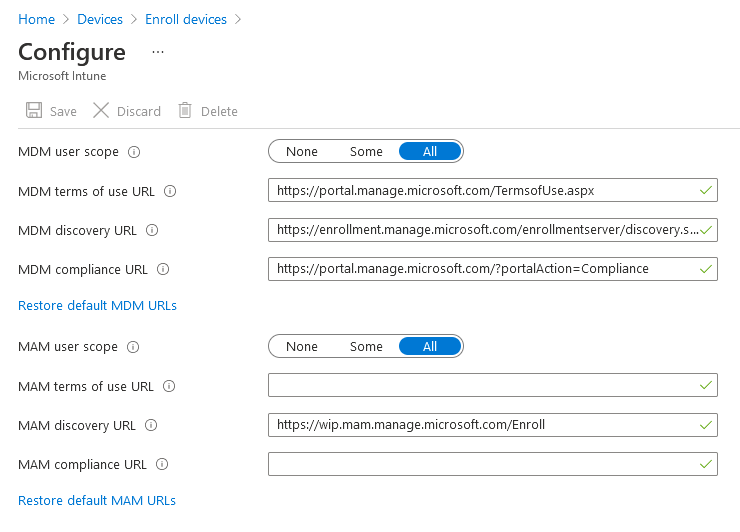
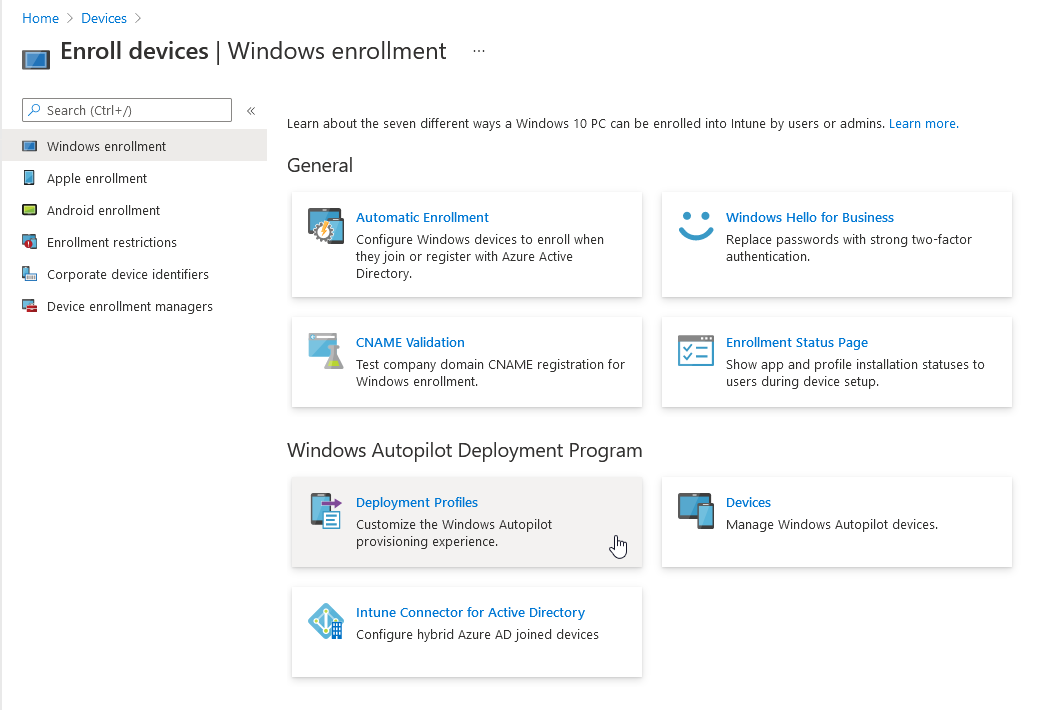
Now the next step is to create a Autopilot deployment profile in the destination tenant. To create the profile go to https://endpoint.microsoft.com > Devices > Enroll Devices > Deployment Profiles
Click on “Create profile” and then choose “Windows PC”. Fill in the required information, like below.
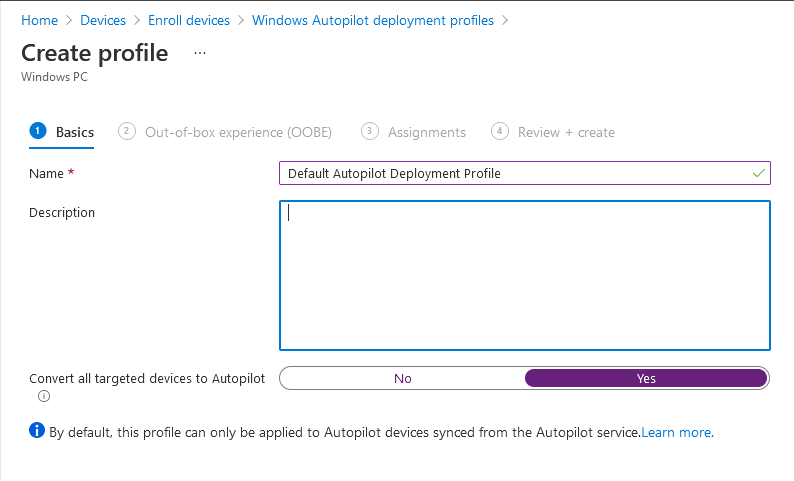
As you can see I have chosen to “convert all targeted devices to Autopilot”, this means that the device will be registered in Autopilot as well as Intune. If the device was to be wiped, the next time is runs through OOBE it will run through the same process without the need for a offline Autopilot configuration, which we are running through now.Click “Next”. This will take you to the OOBE configuration. Here you can choose what you want the user to see when the device is going through OOBE. These settings shown below are the default settings. They can be changed as per your needs.
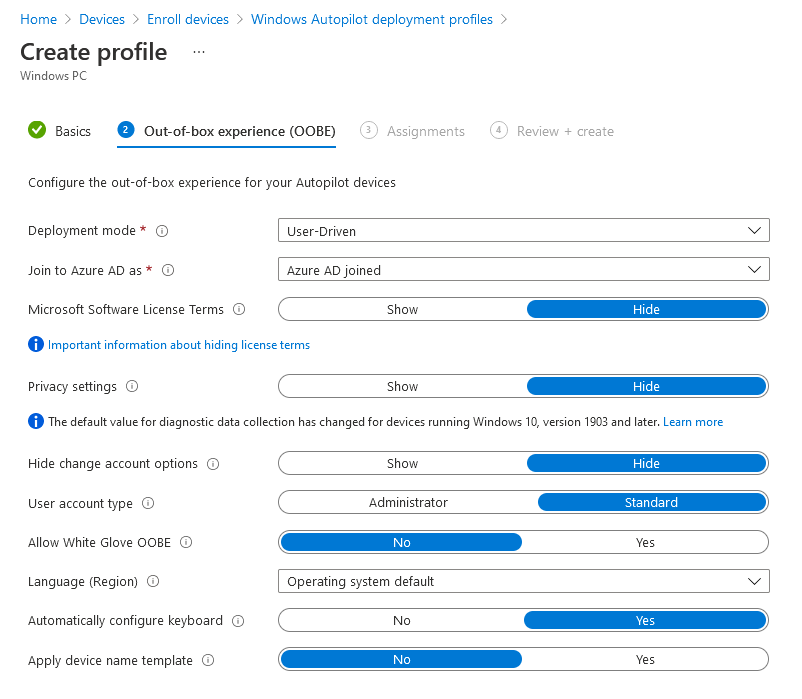
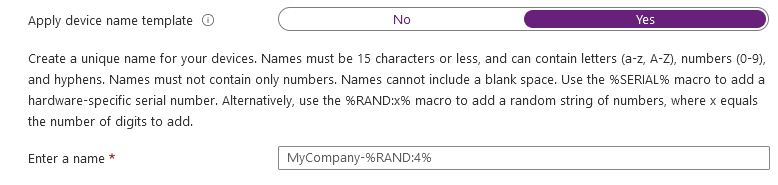
I would recommend turn on “Allow device name template” as this will allow you to rename the machine during the registration process when the user signs into the machine and registers it with Intune.
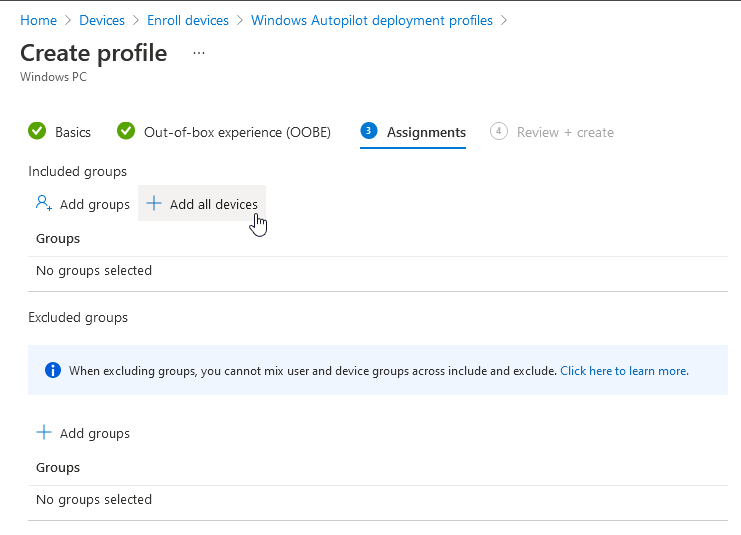
Click “Next”. You will now be given the option to where you want to assign the profile. To cover all devices, click on “Add all devices”. This will mean that any devices that are registered with Intune will also be registered in Autopilot.
One final click of “Next”, here you can review the profile configuration and then click on “Create”.
Exporting the Autopilot Profile
So now that we have created the Autopilot deployment profile, we need to export this in to the AutopilotConfigurationFile.json. It has to be called “AutopilotConfigurationFile” to be detected by Windows when booting to OOBE.
To create this file you need to install the Windows Autopilot Intune Module:
|
|
Next we need to connect to the tenant:
|
|
A window will popup for you to enter the credentials to sign in to the tenant.
Now you can pull the Autopilot deployment profile out and in to the AutopilotConfigurationPolicy.json:
|
|
It has to be encoded in ASCII again for Windows OS to be able to use it during OOBE.
Creating the AutopilotConfigurationFile.json Deployment
The next step is to get the AutopilotConfigurationFile.json on to the remote machines before they are wiped. To do this we need to create an .intunewin file and Windows App (Win32). This needs to be done in the source tenant, where the devices are currently being managed. I have found a powershell script which helps with automating the checking or creation of the Autopilot folder and also populating it with the AutopilotConfigurationFile.json file.
|
|
Save this powershell script as Invoke-AutopilotJSONDrop.ps1.
Creating the .intunewin file
- You will need to download a command line tool from Microsoft to help create the .intunewin. It can be found here.
- Run the IntuneWinAppUtil.exe and to fill in the information needed:

Creating the application
-
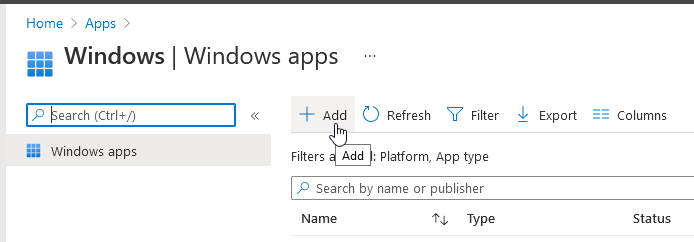
To create the Windows App you need to go to https://endpoint.microsoft.com > Apps, then under Platform, click on Windows. You will now something similar to the below.
-
When you click on “+ Add” you will then need to choose the type of app you would like to create. In this case you need to choose “Windows App (Win32)”.
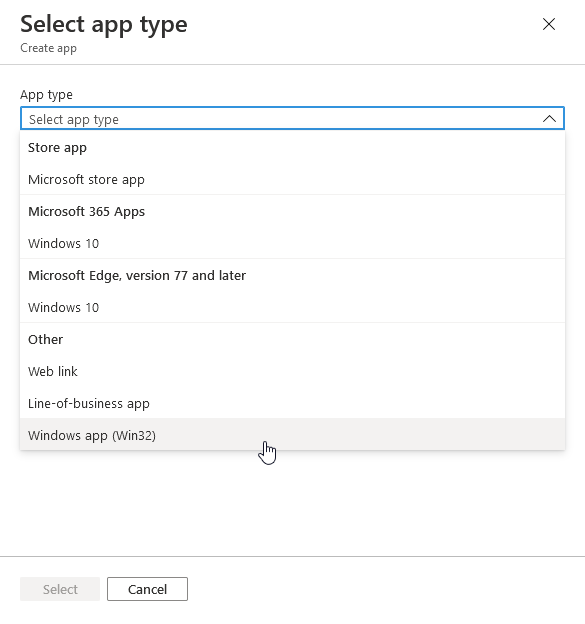
Once you have chosen “Windows App (Win32)”, click on “Select”. -
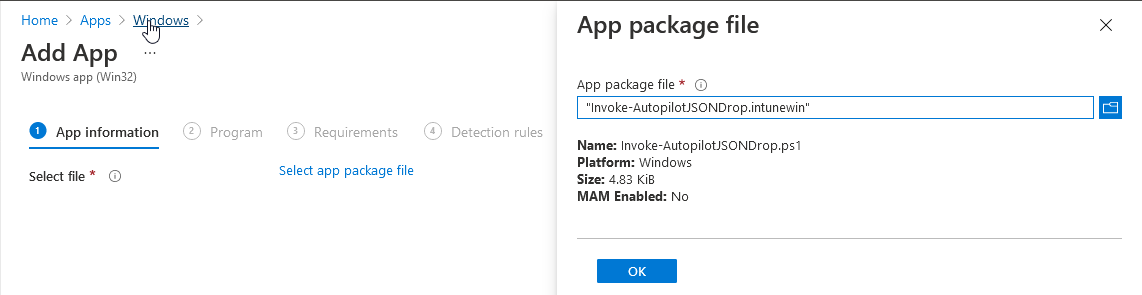
Now you are going to need to select the .intunewin file created previously.
-
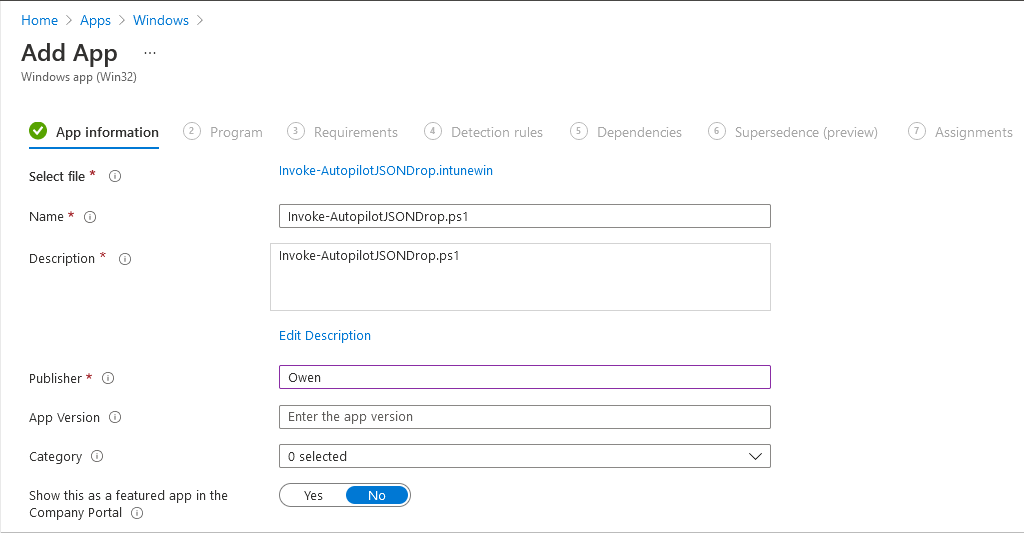
Once selected you will need to fill in more information. The minimum here is to add a “Publisher”.
 Click Next.
 -
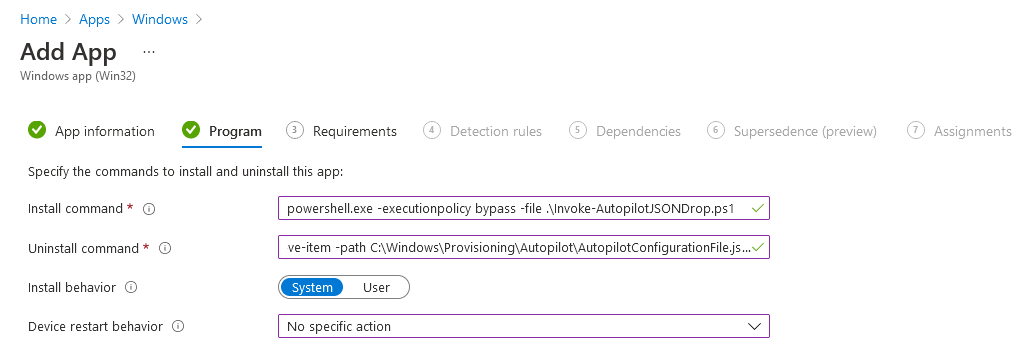
Now you need to enter the “Install Command” and “Uninstall Command”. These will be as follows: Install Command:
1powershell.exe -executionpolicy bypass -file .\Invoke-AutopilotJSONDrop.ps1"Uninstall Command:
1powershell.exe -command “remove-item -path C:\Windows\Provisioning\Autopilot\AutopilotConfigurationFile.json”After entering the above information, the rest of the configuration can stay as default.
 Click “Next”
 -
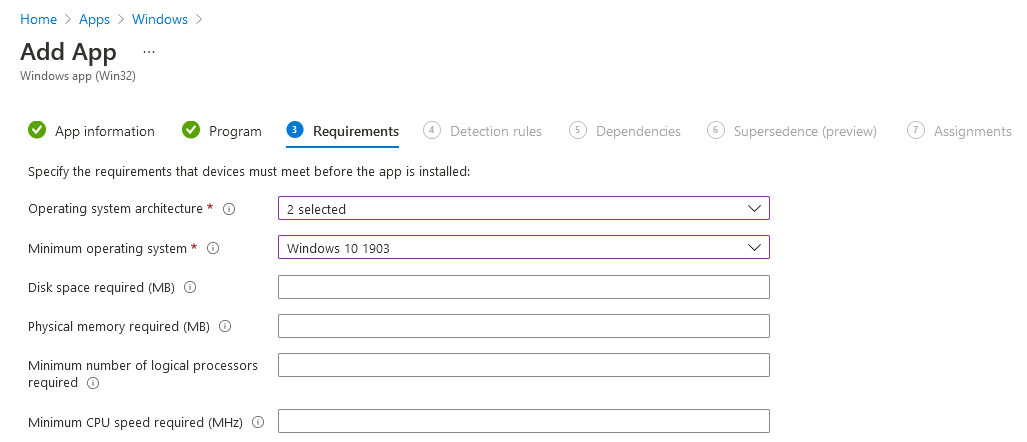
Next is setting the requirements, this will be differ based on the OS architecture and the lowest Windows 10 version in Intune. The rest of the configuration is optional.
-
Next is the detection rule, which Intune uses to detect whether the application is installed or not. We will use the AutopilotConfigurationFile.json to determine if the application is installed. To do this we need to set the “Rules Format” to “Manually configure detection rules”, this will now give you the option add rules.
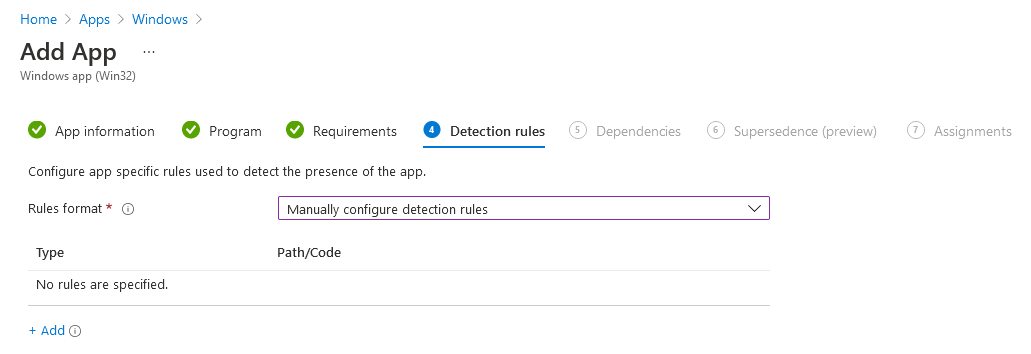 Click on “+ Add”.
Now you will need to create the following rule:
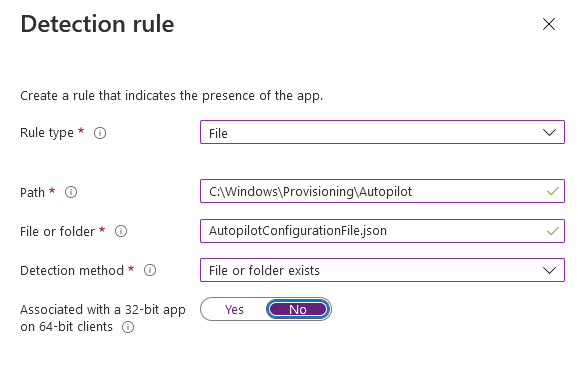 Click “OK”
Dependancies and Supersedance can be skipped in this scenario.
Now in “Assignments”, you can choose whether to let users install the application themselves or have it install itself. In this scenario we are choosing to let users install it themselves from the “Company Portal” store.
 If you want to push it out and the application be installed automatically, assign it under “Required”
Testing the application
-
To test the application you will need to have the “Company Portal” installed to be able to access the application.
-
Click on the application that you have just created and click on “Install”.
-
Once the application is installed, to confirm that the application is installed the AutopilotConfiguratonFile.json file will be in the C:\Windows\Provisioning\Autopilot folder.
As we created a Detection Rule when creating the application, we can also use Intune to check that the application is installed on the user machines.
Wiping the device
So now that you have confirmed that the application is installed on the users machine we can now go ahead and start the process of wiping the machine and removing it from the old tenant.
-
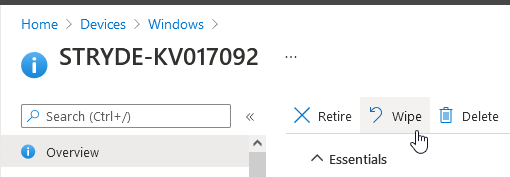
Find the device in Intune and choose “Wipe”.
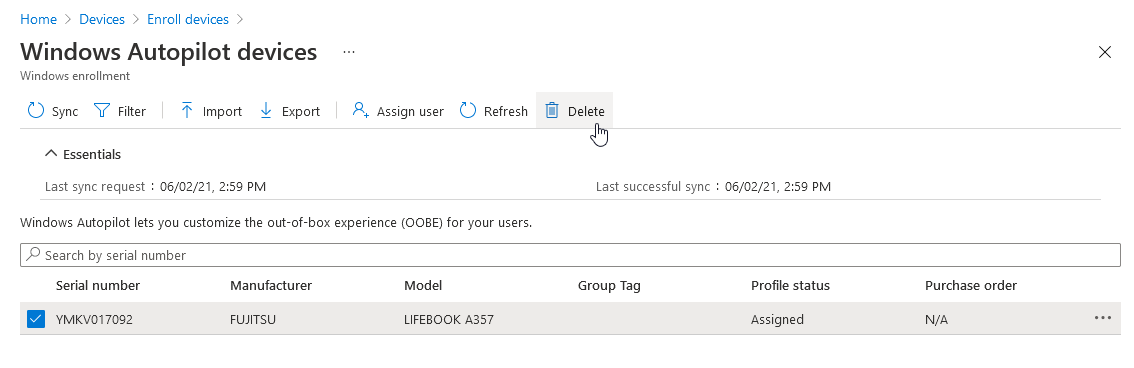
If the device has also been enrolled in Autopilot you will need to remove the device from Autopilot too.
-
When you click on “Wipe” you will see the following:
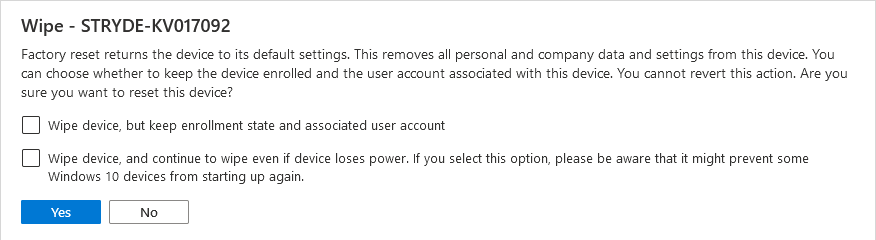
You dont need to check either of these options.
It will take a few minutes for the wipe on the device to start, but once its started the user just needs to make sure that the device stays powered on.
Adding device to new tenant
Once the machine has completed the wipe process, the user will be shown the OOBE. From what I found is that the user will need to enter the language and the keyboard. The user will then be shown the login screen for the new tenant branding, where they will need to enter their login details to Office 365.
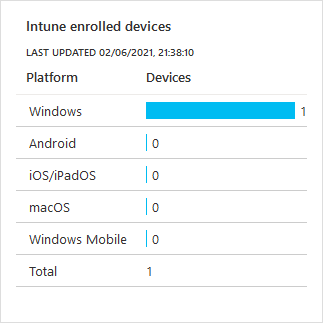
Verifying
To verify the process has worked correctly, visit https://endpoint.microsoft.com > Devices.
You should now see the devices listed here.